
 de
de


Authorization in the Jira module
In addition to manually creating tasks in projects, AtTrack also supports synchronization with third-party task management services. With the help of the Jira integration module, it is possible to link a Jira project to a project in AtTrack, as a result of which tasks created in Jira will be transferred to the “Tasks” tab inside the project. You can read how to connect this module here. Only the Administrator and the Project Manager can perform authorization in the Jira module.
1. Go to the "Projects" section. In the list of projects, find the desired project and click on the project name.

2. On the project page, scroll down a little - there you will see the "Modules" section. In the Jira Integration module, click Add Account.

3. In the window that opens, select which type of Jira you are using.

If you are using the cloud version of Jira, click on the "Log in to Jira" button under the “Cloud version " label. After clicking on this button, you will be taken to the authorization page on the Jira website.

After the successful confirmation of the integration procedure, you will see the status of the connection in the list of available connections.
Next, when you try to select a project, you will be asked to enter an API token. You can get it by clicking on the link: "Atlassian account". Generate it there and paste it into AtTrack.
4. Server authorization. If you have Jira installed on your server, click on the "Log in to Jira" button under the “Server version " label. Next, you need to provide a link to your Jira and click "Confirm".

After that, you need to specify through which type of authorization you want to link Jira to the project. There are two types available:
a) By login/password
b) OAuth 1.0
Attention! (For OAuth 1.0, you also need to make additional settings on the Jira side. For more information, see the point 5 below of this manual)
When selecting the type (a) “Login with username/password” - you need to enter the username and password from your Jira account and click “Log in”.

Upon successful authorization, you will see the connected connection in the list of available connections.

When selecting the type (b)“Log in with Oauth” and click on " Log in to Jira” You will be taken to the login page on the Jira website.

After the successful integration confirmation procedure, you will see the status of the connection in the list of available connections.

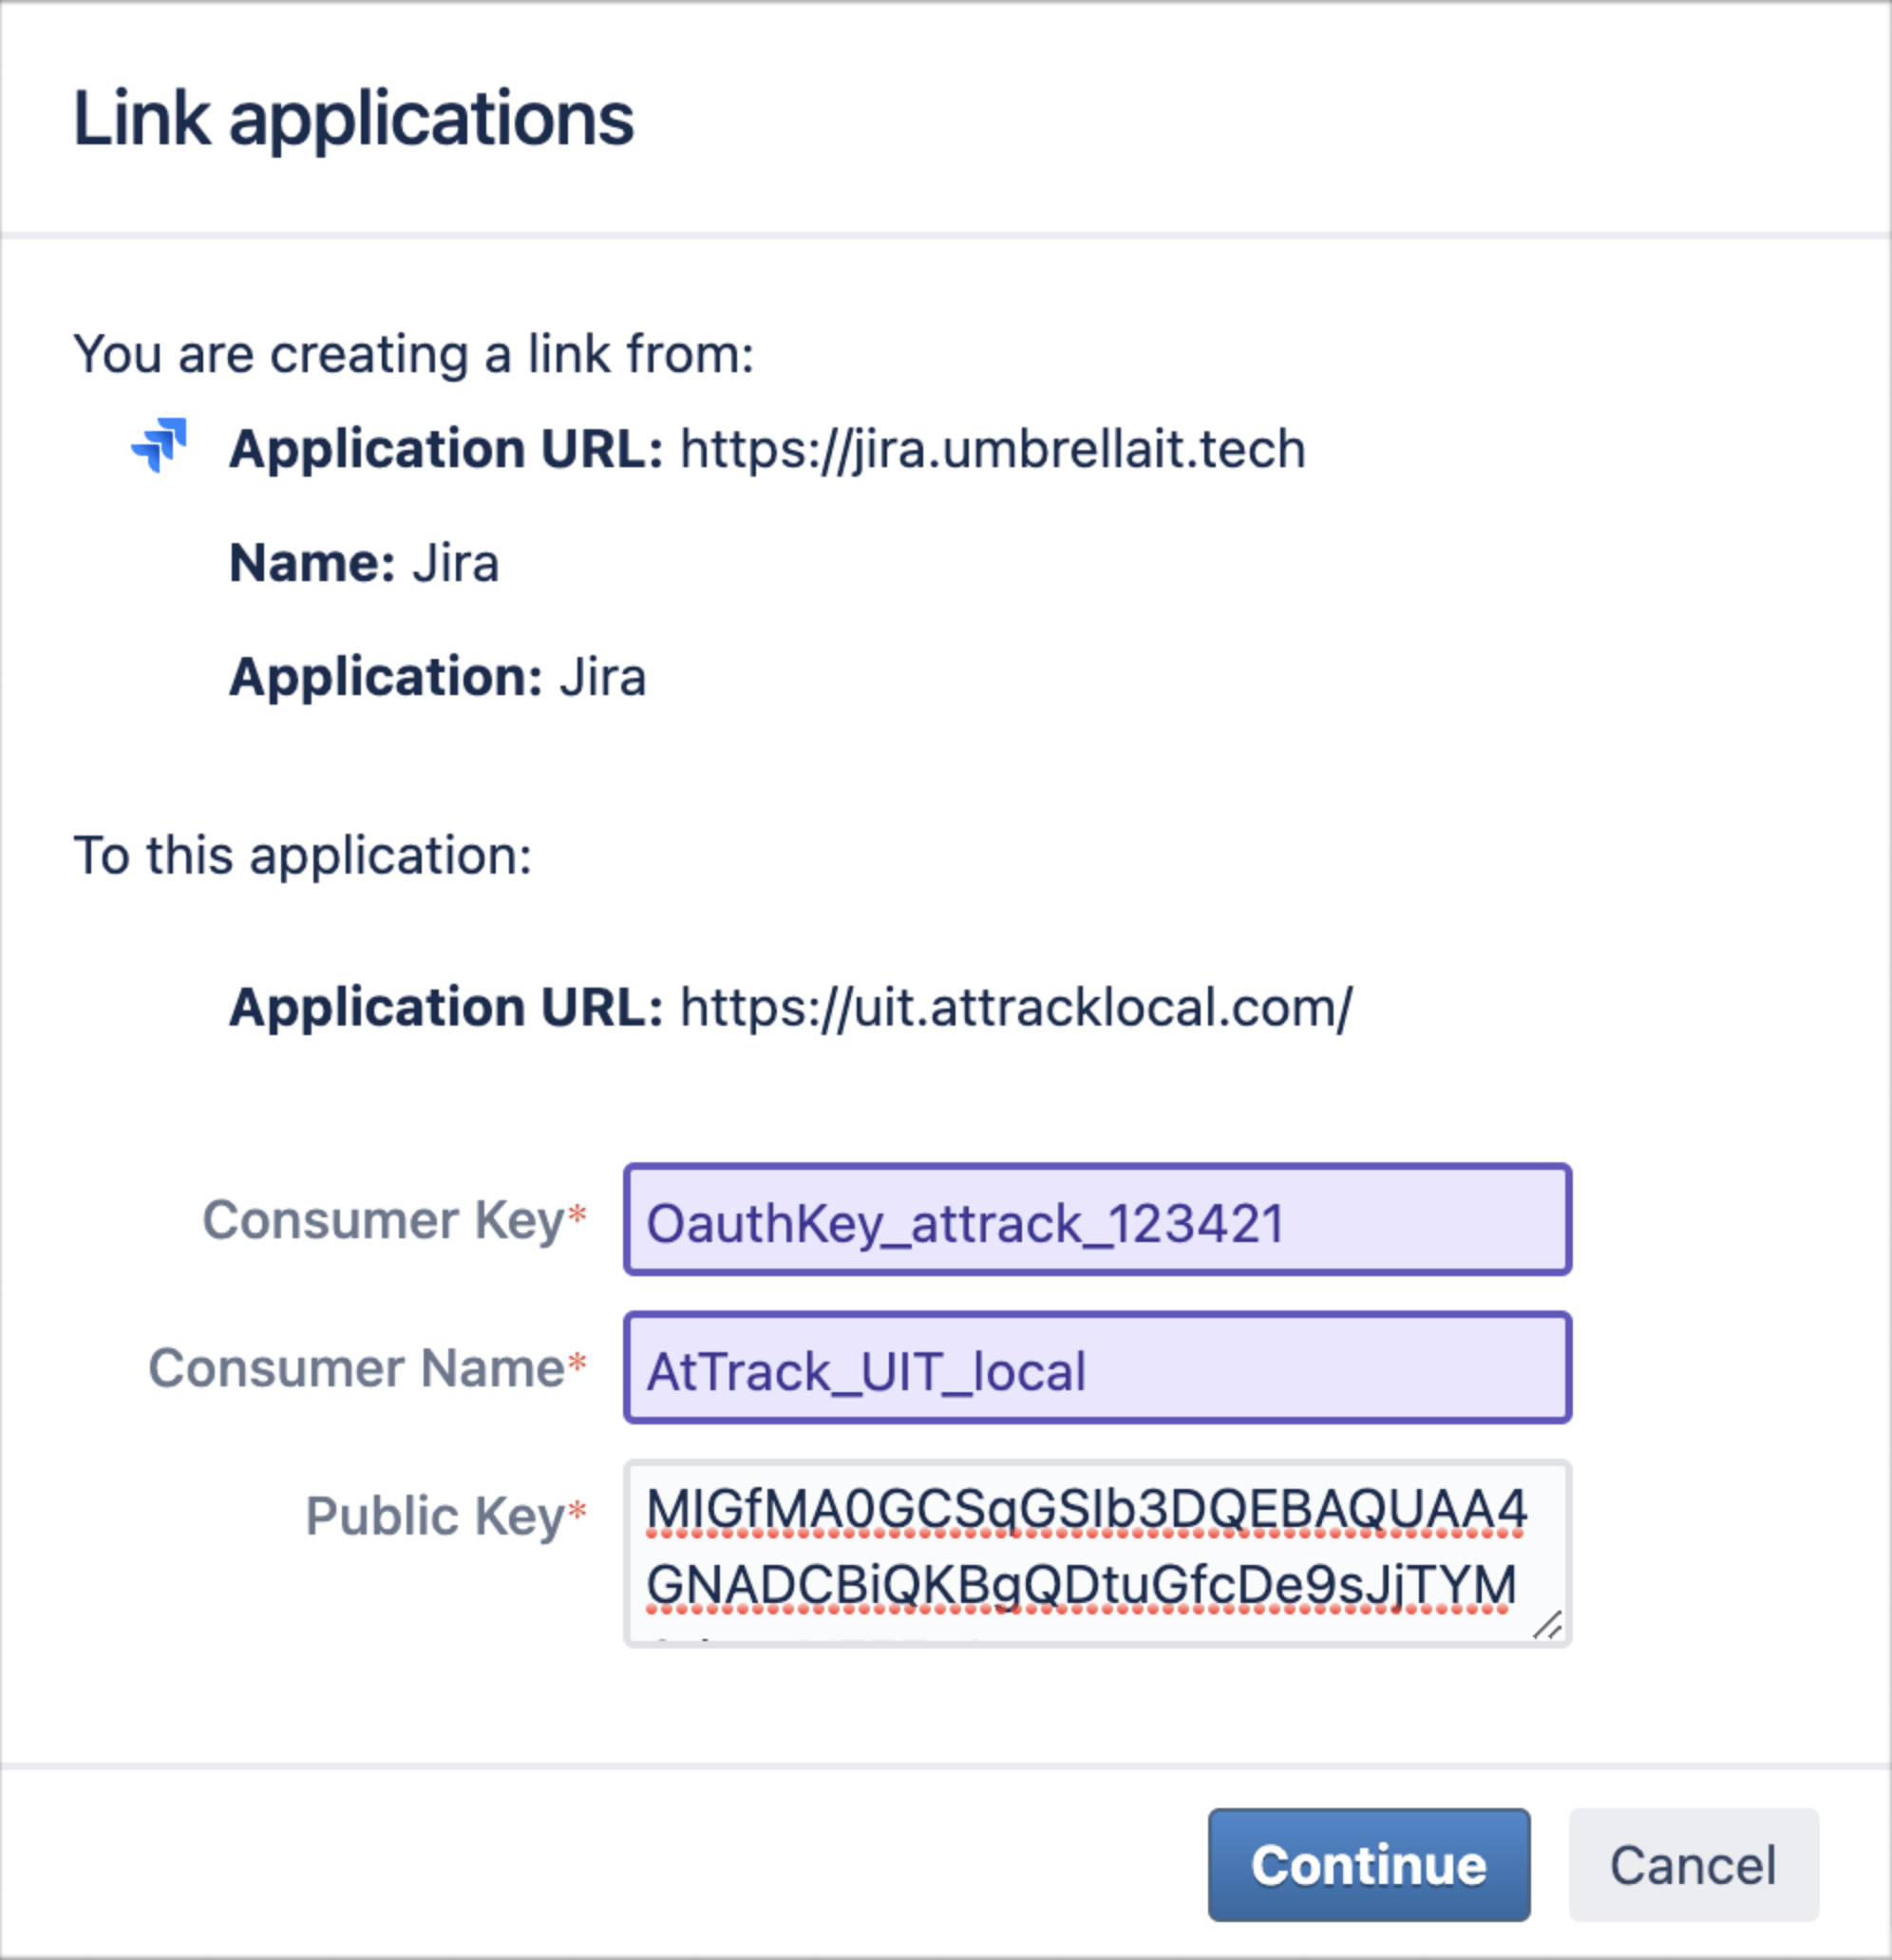
5. Setting up a selfhosted (server-side) Jira. In order for all the integration functionality to be available, you need to make some permissions in the administration panel of Jira itself. To do this, go to "Administration”, then to the "Applications" section and select "Communication with applications". In this section, enter a link to the AtTrack itself and click "Create a new link”.

In the app names section, specify any name. For example - " Integration AtTrack” The application type must be " Basic Application” And the “Create external link " checkbox should be checked. Click the "Continue" button.

Now you need to specify the following:
Consumer key: Oauth_attrack_prod
Username: any or for example: AtTrack
Public key (public key):
MIICIjANBgkqhkiG9w0BAQEFAAOCAg8AMIICCgKCAgEAyX+UeLzFusrOoxwkLjtQ8smFXxD/i3OCF+7QAS2agFWkH/66xwlDjpgvZHOfTCukLtI1PvHJiAZLn0+Xrp92ghZYoMoEPK9tOu9bPTg9QOSzcNWZxB1tXbh93JJT1NztTjJd0RIR3e0ecbJ2iSjn+GgsvFY6+SR0L55EGjOdqdBmEBy1SyihU/2Khf48ZC5Ah2bdTpiqYDzE+hNmlBmdAnLNxkNSLcz3ADvWWzGyj159P0c/LQPR0Q8WS2vjijnPEz2EKICrTAIlPndPvxeZG5qaBfwjuClbP+eKYnOc2EOrf9NUWK2H9boqks8LYtI8BwFan+rhbkOhs+MyA6w3WrYdwjW4Ntz4tQDO+sGxGwCBbWnF1ktv5ZUdQk4nSFVpG28N1w+3EmbwRwuQRs8SIBo0WfxzSbC8mzT/6JxrAvnHCN1DKLmpXUdw8w2jPOZSfN0ik84ORo8xSY+p7UNDymbByZXC8valIg4jFB5mf7bEBBxlpCEQlEshk0B2s9TKi/FymFQX06fke6aozogsAqhpIGeXY+rjLhuFRv14kRyuvP1H10I9inAlJHW4Yxkd4HuRzMNdOXgNzfW86uRrohtlUADe9RJkwPXuybFsKN5cCNj/P2Zf49mUkljhHoR37nFWzwvarHt+CZlCEWKSgKguy71dnmiJvtLyEtq5Ki8CAwEAAQ==
After that, click the "Continue" button.
After saving the settings, the integration will be displayed in the list of available ones.

Now you need to grant access rights to get projects when integrating via OAuth 1.0 To do this, go to "Administration”, then to the “User Management" section and select the group in which the user who integrated with Jira in AtTrack consists, then go to”Access Rights Scheme".

In the view projects section, you must be given permission to view projects for everyone. Without this, projects will not be able to catch up in AtTrack.

If there is no such permission, then click the "Edit" button in this section and specify "Group” - "For all". Then click the “Submit " button.”

★ You have successfully logged in to Jira and can start linking the project and syncing tasks. You can find out how to do this here.